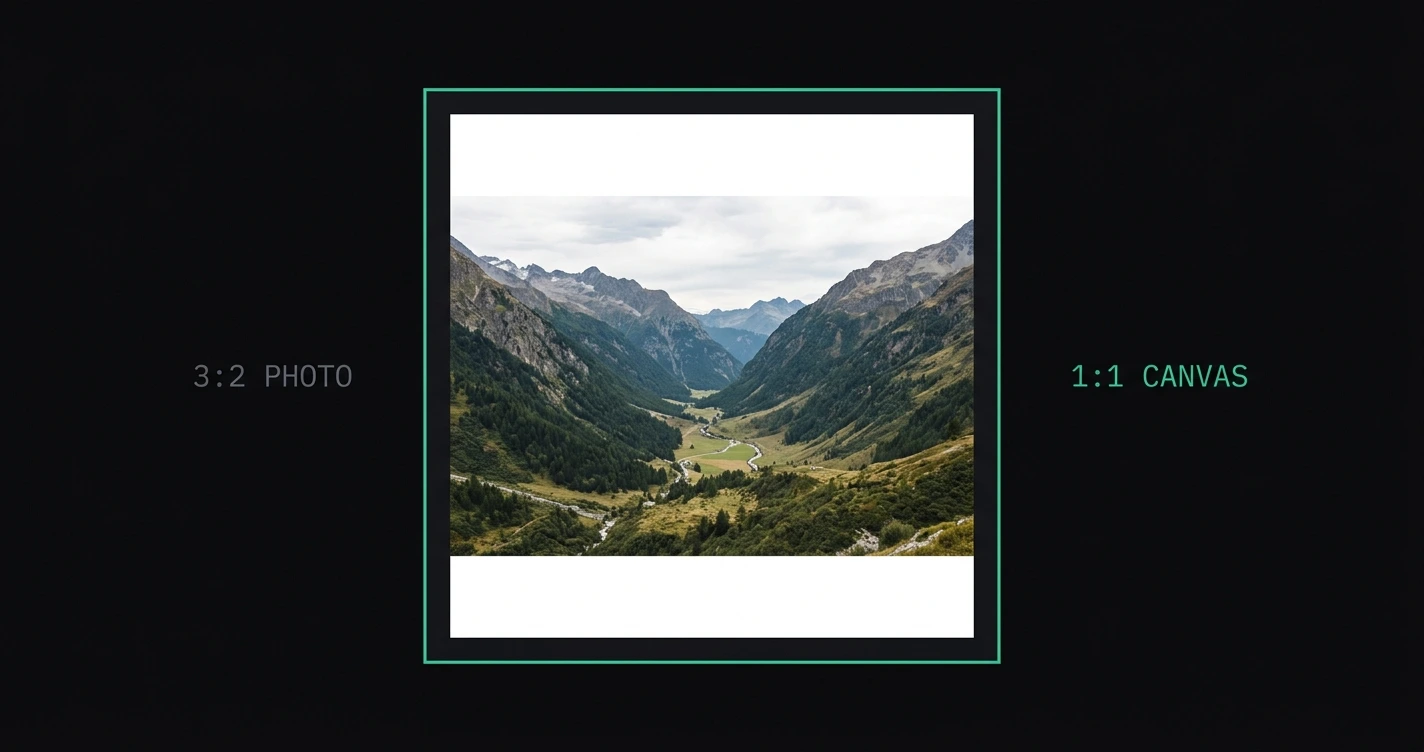
Adding borders to an Instagram photo serves a concrete purpose: it converts any aspect ratio into a format Instagram accepts without removing any part of the image. The border fills the gap between your original composition and Instagram's required dimensions.
For the full list of Instagram's supported dimensions, see the Instagram image sizes cheat sheet.
TL;DR: Add borders (padding) around your photo to reach Instagram's 4:5 or 1:1 target dimensions — your full image stays visible. AspectFit does this in-browser: drop in a photo, choose a border style, download. No upload, no cropping, no registration.
On this page:
- Why add borders instead of cropping
- Border styles: which to use
- How to add borders with AspectFit
- How to add borders in other tools
- Choosing the right target ratio
- Tips for consistent borders across a batch
- Frequently asked questions
Why add borders instead of cropping
Instagram enforces these aspect ratio limits on feed posts:
| Format | Ratio | Dimensions |
|---|---|---|
| Portrait max | 4:5 | 1080 × 1350 px |
| Square | 1:1 | 1080 × 1080 px |
| Landscape max | 1.91:1 | 1080 × 566 px |
Photos outside this range get cropped by Instagram automatically. A landscape 3:2 shot from a DSLR, posted in portrait orientation, gets cut at the sides. A 9:16 vertical iPhone photo gets cropped at the top and bottom.
Adding borders before posting solves this by expanding the canvas to a ratio Instagram accepts — without cutting anything out of the original. The photo is displayed in full, surrounded by a border that fills the remaining space.
This is especially relevant for:
- Landscape shots from DSLRs (3:2 ratio)
- Ultra-wide or panoramic photos
- Phone screenshots
- Product flat lays that need full composition intact
- Photographers who want no part of their image cut
Border styles: which to use
White borders
Clean and minimal. Works across most content types and creates a film-like appearance for photography. The default choice for photographers posting on white-grid Instagram profiles.
Best for: Portrait photography, product shots, clean editorial content, minimal brand aesthetics.
Black borders
Cinematic — creates a letterboxing effect similar to widescreen film. Useful for moody, dark, or high-contrast photography where black padding recedes visually.
Best for: Night photography, dark-toned landscapes, moody street photography, video stills.
Blurred background
The original photo is blurred out and scaled up to fill the background area. Keeps the color palette and mood of the original intact. Avoids the solid-color look, which some creators find visually jarring on certain photos.
Best for: Colorful travel photos, nature shots, any image where solid white or black clashes with the tone of the original.
Custom color
Any hex color as the border fill. Useful for branded content where border color is a defined visual element. Matches a brand palette exactly.
Best for: Brand content, product marketing, creators with a defined color system.
How to add borders with AspectFit
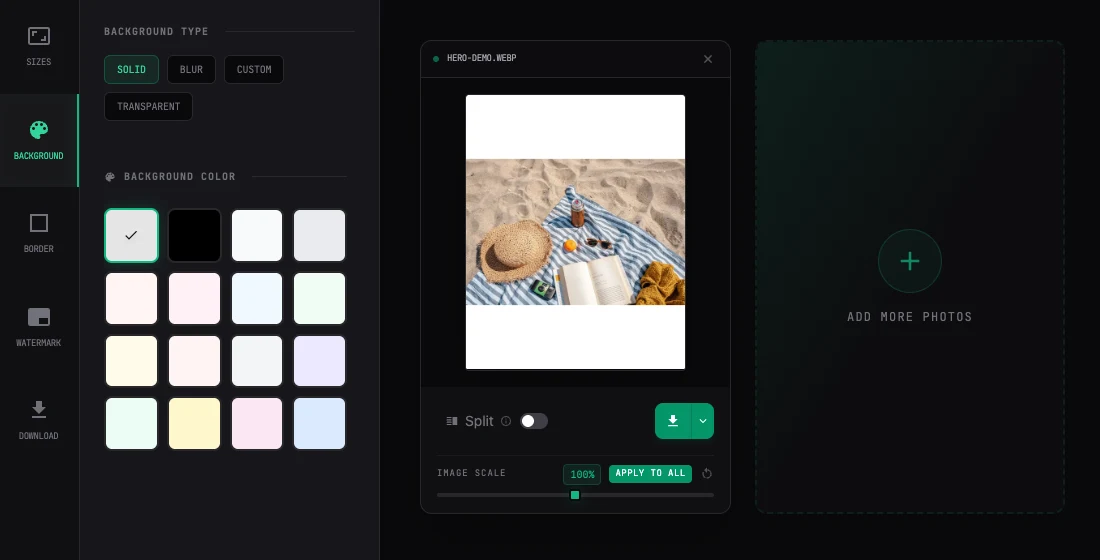
AspectFit processes photos directly in your browser — nothing is uploaded to a server.
Steps:
- Open AspectFit
- Drop in your photo (or tap to select)
- Select the target format: 4:5 (portrait) or 1:1 (square) — see best aspect ratio for Instagram posts in 2026 if you're unsure which to use
- Choose a border style: white, black, blurred background, or custom color
- Preview the result
- Download
The output is a full-resolution image at the exact target dimensions, ready to post directly to Instagram.
Batch processing: Drop in multiple photos at once. AspectFit applies the same settings to all of them and packages the output as a ZIP download. Consistent border style across the full batch without processing each image individually.
How to add borders in other tools
Lightroom (desktop)
- In Develop, use the Print module with a custom page size
- Or export with a Canvas Size increase (Edit > Canvas Size in Photoshop after export)
Lightroom has no native in-app border/padding feature — it requires workarounds. Not practical for batch work.
Canva
- Create a canvas at the target Instagram dimensions (1080 × 1350)
- Place your photo in the center
- Set the canvas background to your border color
- Download
Canva is functional but requires manual positioning for each image. The free tier compresses output. Files are uploaded to Canva's servers.
Photoshop
- Open your image
- Image > Canvas Size — set the new dimensions and anchor the image to the center
- Fill the extended area with your border color
- Export for web
Precise but slow for batches. Requires a paid subscription.
Instagram's built-in resize
Instagram's resize button (tap the two-arrows icon when adding a post) adds automatic white or black bars. No custom color, no blurred background option, limited to minor adjustments.
Choosing the right target ratio
The target ratio determines how much border appears around your image.
| Source ratio | Target ratio | Border amount |
|---|---|---|
| 3:2 landscape → 4:5 portrait | Large border top and bottom | Full letterbox effect |
| 3:2 landscape → 1:1 square | Medium border top and bottom | Moderate padding |
| 1:1 square → 4:5 portrait | Small border top and bottom | Thin strips only |
| 9:16 portrait → 4:5 portrait | Border left and right | Pillarbox effect |
For maximum feed visibility, 4:5 is the recommended target — see best aspect ratio for Instagram posts in 2026. For a consistent grid aesthetic, 1:1 is the alternative.
Tips for consistent borders across a batch
If you're posting multiple photos — a photo series, a trip gallery, a product collection — consistent border style across the batch creates a more cohesive profile grid.
- Fix one style before processing: Choose white, black, blurred, or custom once, then batch-process all images. Changing border style mid-batch creates visual inconsistency on the grid.
- Use the same target ratio for all slides: For carousels especially, all slides should share the same aspect ratio to avoid layout shifts between slides. The Instagram carousel image sizes guide explains what happens when they don't.
- Match border color to your grid palette: If your brand uses a specific background color on all posts, set that exact hex value as the border color.
AspectFit applies the selected style to all dropped images uniformly, which removes the need to re-apply settings per image. If the batch also needs a logo or credit line, how to add a watermark to multiple photos at once covers doing both in the same pass.
Frequently asked questions
Does adding a white border reduce image quality? No. The border is added to the canvas — the original photo pixel data is not re-compressed or altered. Output quality depends on the export compression setting, not on the border itself. AspectFit exports at full resolution.
What size should borders be? There is no fixed pixel size for borders — the border is whatever area remains after centering your photo in the target canvas. A 3:2 landscape photo padded to 4:5 portrait will have wider top/bottom borders than a 4:3 photo padded to the same target. The exact pixel dimensions are determined by the source and target ratios.
Will Instagram compress my bordered image? Instagram compresses all uploads. To minimize visible quality loss, upload at the full recommended resolution (1080 px wide minimum) and use JPEG at 85–90% quality. PNG is supported but produces larger files without meaningful quality benefits for photos.
Does the white border trick still work on Instagram in 2026? Yes. Adding borders is a standard preparation technique that works with Instagram's current feed format. It does not violate any posting rules. The bordered image is simply a photo at a supported aspect ratio — Instagram has no way to distinguish it from any other post.
Can I add a blurred background to a portrait photo? Yes. Portrait photos padded to 1:1 with a blurred background fill produce subtle pillarbox bars on the sides, with the original image color palette filling the background.
Is there a tool that adds borders without uploading my photos? AspectFit runs entirely client-side — all processing happens in your browser. Your photos never leave your device. For other tools that work the same way, see the best free tools to resize images for Instagram without uploading.