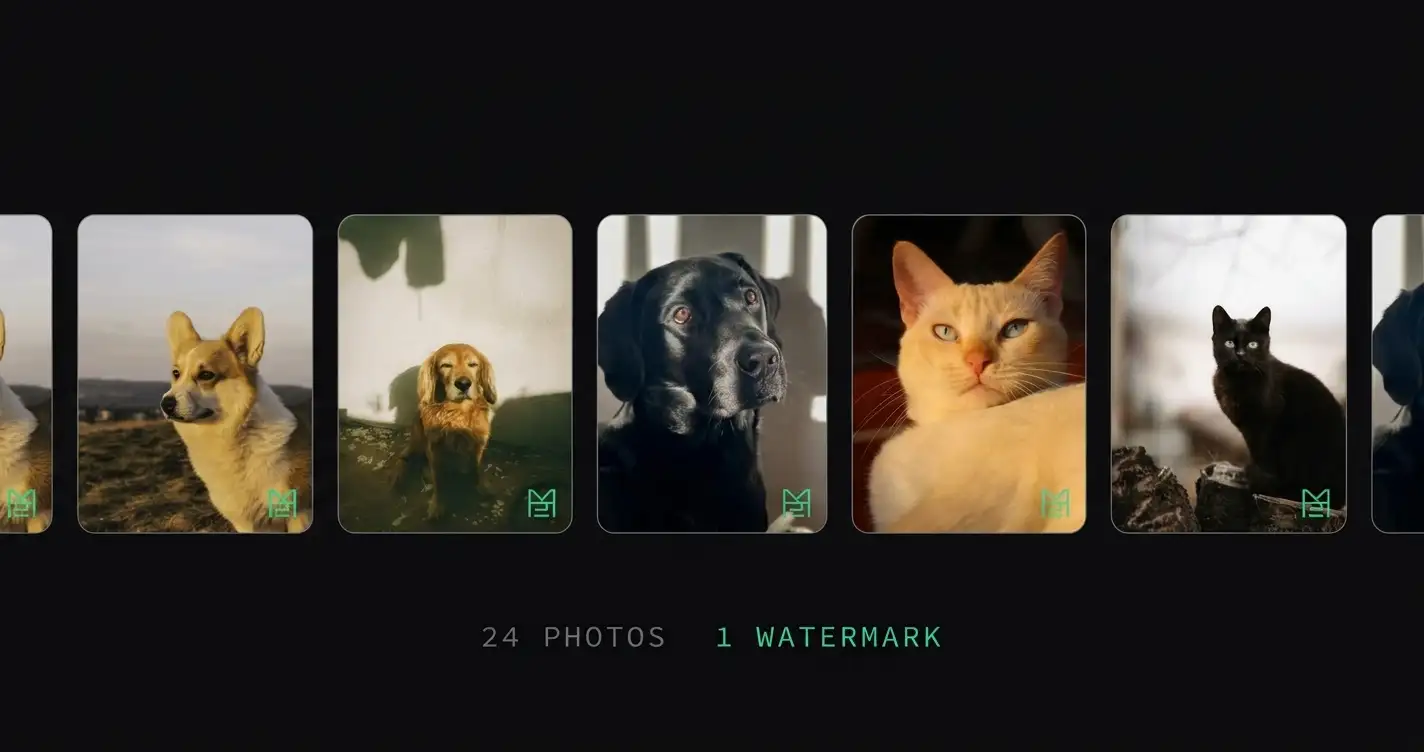
Watermarking photos one at a time is the bottleneck that makes most photographers give up on consistent branding. The math is straightforward: 30 photos from a session × 3 minutes each = 90 minutes in Lightroom or Photoshop before posting anything.
Batch watermarking solves this. Drop all your photos, apply the watermark once, download.
TL;DR: AspectFit applies a logo or text watermark to multiple photos simultaneously — all in-browser, no upload required. Drop your photos, set your watermark style once, download a ZIP. Every image gets the same consistent treatment.
On this page:
- Why batch watermarking matters
- How to batch watermark with AspectFit
- Watermark placement and size options
- Logo vs text watermarks
- Saving your watermark for future batches
- Watermark opacity and visibility
- Combining watermarking with Instagram resizing
- Other batch watermark tools
- Frequently asked questions
Why batch watermarking matters
A watermark does two things: it identifies your work as yours, and it functions as persistent branding when screenshots or reposts circulate without a link.
The challenge with most watermarking tools is that they are designed around single-image workflows. Lightroom's watermark export works, but requires setting up a preset, going through the export dialog, and waiting. For a 20-image batch, that's still 5–10 minutes of process overhead beyond the watermarking itself.
For photographers and creators who post regularly — not just occasionally — batch processing closes that time gap.
How to batch watermark with AspectFit
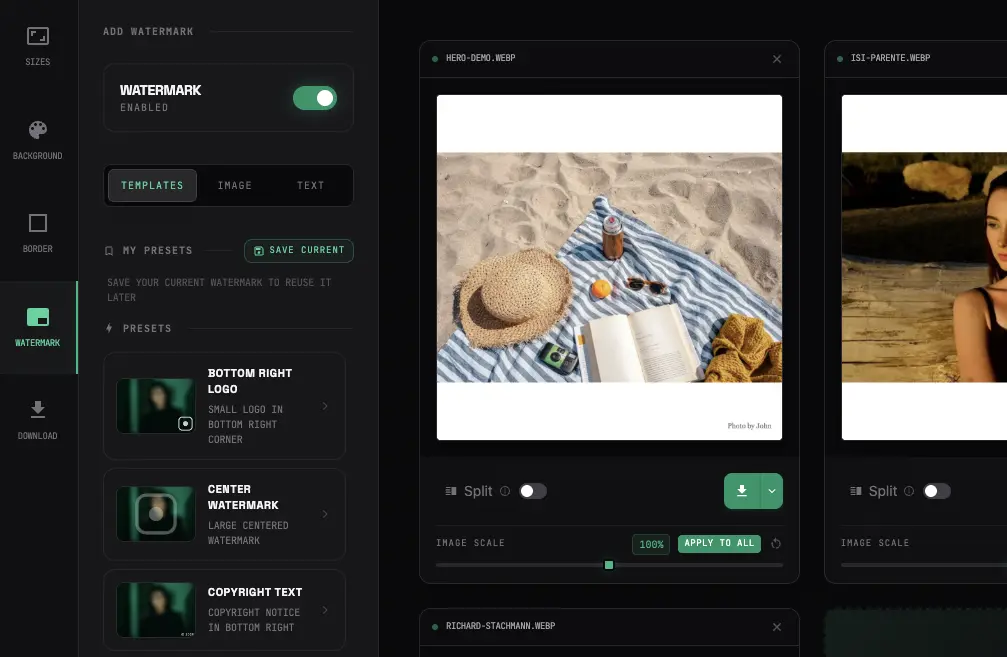
Steps:
- Open AspectFit
- Drop in your photos — any number, any format (JPEG, PNG, WEBP, AVIF supported)
- Open the Watermark panel in the sidebar — it lands on Quick Templates first, including a preconfigured "Protect" tiled pattern if you want anti-theft coverage instead of a single mark
- Upload your logo (PNG with transparency recommended) or enter watermark text
- Set position, size, opacity, and placement (see below)
- Click Save as preset to reuse this exact setup on your next batch without reconfiguring it
- Set your target Instagram format if you also want to resize: 4:5, 1:1, or original
- Click Download All — receives a ZIP with all watermarked images
AspectFit processes up to 4 images in parallel. For a batch of 20 images, the full process typically completes in under 30 seconds.
Watermark placement and size options
Placement consistency across a batch matters. If some images have the watermark in the bottom-right and others in the center-bottom, the result looks unpolished when viewed on a profile grid.
Supported positions: a 9-position grid (top-left through bottom-right, plus center).
| Position | Use case |
|---|---|
| Bottom-right | Most common — unobtrusive, standard for photography |
| Bottom-left | Alternative for images where the bottom-right is visually busy |
| Bottom-center | Bold, centered branding — works for brands more than photographers |
| Top-right / top-left | Less common — usually reserved for editorial or news-style work |
| Center | Aggressive protection against unauthorized use — reduces photo enjoyment |
Placement anchor: a toggle sets whether the position grid measures against the whole canvas (default) or the photo only. On a padded or letterboxed image, "bottom-right" anchored to the canvas can land inside the background bar instead of on the photo's own corner — switch to Photo Only to keep it on the image itself. Nudge sliders (−25% to +25%) fine-tune the offset from there, and a rotation slider (−90° to +90°) angles the mark if you don't want it on the horizontal.
Size: expressed as a percentage of the canvas's shorter side, so it holds steady across a batch of mixed source resolutions instead of drifting with each photo's dimensions. Logo watermarks run 5–50%, with 5–10% the typical range for an unobtrusive mark. Text watermarks use font size 1–15%. Padding around the mark is 0–10%. Because these are relative values rather than fixed pixels, the preview and the full-resolution export now show the watermark at the same relative size — a 12 MP photo and a 48 MP photo in the same batch get identical-looking placement.
For full anti-theft coverage across a batch, the Protect template repeats the watermark in a tiled brick pattern across the whole image (density 1–5) instead of a single corner mark — it ships preconfigured at a diagonal angle and low opacity.
Logo vs text watermarks
Logo watermarks
A logo PNG with a transparent background produces the cleanest result. The logo renders directly onto the photo without a bounding box or background color.
Requirements for best results:
- PNG format with transparency (not JPEG)
- White or light-colored logo for use on darker images; dark logo for lighter images
- Resolution at least 300 × 300 px for sharp rendering
If your logo is only available on a white background, you can remove the background with tools like remove.bg before using it as a watermark.
Text watermarks
Text watermarks are faster to set up — no separate file needed. Enter your name, website, or handle and set font size, color, weight, and family (five web-safe choices: Sans, Serif, Mono, Narrow, Script — no font downloads, so processing stays local). Stroke is on by default, which keeps light text visible on light backgrounds instead of disappearing into them.
Text watermarks are less forgeable than logo watermarks and render clearly at small sizes, but they're easier to clone-stamp out than a complex logo in Photoshop.
Recommended format for text watermarks:
@yourhandle— connects directly to your Instagram profileyourwebsite.com— works for photographers with portfolios© 2026 Your Name— formal copyright attribution
Saving your watermark for future batches
Once a watermark has content — a logo or your own text — a Save as preset button appears under the Image and Text tabs. Save it and it sits above the built-in templates, newest first, ready to apply to the next shoot in one click instead of rebuilding position, size, opacity, rotation, and font from scratch.
- Up to 10 presets; at the ceiling, saving asks you to delete one first
- Saving over an existing preset name replaces it instead of creating a duplicate — useful when you're dialing in a brand mark over several sessions
- Rename or delete a preset from its card; delete asks for confirmation first
- Presets are stored on your device only (settings in
localStorage, logo bytes in IndexedDB) — nothing is uploaded, same as the rest of the pipeline
For a studio watermarking multiple shoots a week, this turns batch watermarking into a two-click operation: pick the preset, download all.
Watermark opacity and visibility
A watermark needs to be visible enough to attribute the image but not so prominent that it competes with the content.
| Opacity | Effect |
|---|---|
| 100% | Fully opaque — maximum protection, maximum intrusion |
| 60–80% | Semi-transparent — visible without dominating the image |
| 30–50% | Subtle — identifies owner, harder to read at a glance |
| 10–20% | Very subtle — barely noticeable on small screens |
For Instagram posts intended to be seen on mobile, 60–70% opacity is the practical range. Anything below 40% is likely invisible on a 6-inch screen.
Combining watermarking with Instagram resizing
The most efficient workflow for photographers posting to Instagram is to resize and watermark in a single step. (Target dimensions for every Instagram format are in the Instagram image sizes 2026 guide.)
With AspectFit:
- Drop in your raw photos at their original aspect ratio (3:2, 4:3, etc.)
- Set target format to 4:5 for optimal Instagram feed visibility
- Enable the watermark and set your logo/text, position, and size
- Download all
The output images are:
- Fitted to 4:5 with smart padding (no composition loss)
- Watermarked at a consistent position and size
- Ready to post directly to Instagram
See how to add borders to Instagram photos for more detail on the padding approach, and best aspect ratio for Instagram posts in 2026 for the rationale behind 4:5.
Other batch watermark tools
| Tool | Batch support | Upload required | Watermark types | Free tier |
|---|---|---|---|---|
| AspectFit | Yes (ZIP download) | No — in-browser | Logo + text | Full feature access |
| Lightroom | Yes (export preset) | Local app only | Logo + text | No (subscription) |
| Canva | No — one at a time | Yes | Text + shapes | Limited (compresses output) |
| Photoshop Actions | Yes (batch automation) | Local app only | Any | No (subscription) |
| iWatermark | Yes | No (local app) | Logo + text | Paid |
The key differentiator for AspectFit is that it handles watermarking and Instagram resizing simultaneously in the browser, with no file upload. For photographers who work without Lightroom or Photoshop subscriptions, it removes the dependency on paid desktop software for batch preparation.
Frequently asked questions
How many photos can I watermark at once? AspectFit has no fixed limit on batch size. Practical limits are determined by your device's memory. Batches of 20–50 photos at standard resolution (12–24 MP) work without issue on most modern laptops. Very large files (50+ MB RAW converted to JPEG) may slow processing on older hardware.
Will the watermark position scale consistently across different photo sizes? Yes. Watermark position and size are set as relative values (percentage of the canvas's shorter side), so they scale correctly across a mixed batch of different source resolutions.
Can I use a transparent PNG logo as a watermark? Yes. PNG with transparency is the recommended format for logo watermarks. The transparent areas render as see-through on the final image.
Can I save my watermark setup and reuse it on my next batch? Yes. Once your watermark has content, a Save as preset button stores the full configuration — position, size, opacity, rotation, font, and logo. Presets are saved locally on your device and appear above the built-in templates. Applying one restores everything about the watermark; aspect ratio and export size stay independent per batch.
Does watermarking affect image quality? No. The watermark is composited onto the image at the Canvas rendering stage. Output quality depends on the export settings — AspectFit exports at the original resolution. Watermark size is stored as a percentage of the canvas rather than fixed pixels, so what you see in the preview is what lands on the full-resolution export — no guessing how a small preview watermark scales up on a 24 MP file.
My photos are never uploaded to a server? Correct. AspectFit uses the browser's capabilities to process images locally. Your photos do not leave your device. The best free tools to resize images for Instagram without uploading compares it with other tools that work the same way.
Can I batch watermark and resize to multiple platforms at once? AspectFit currently targets Instagram aspect ratios (4:5, 1:1, landscape). For multi-platform output in a single pass, you would need to run separate batches per target platform format.